Showing posts with label DIY. Show all posts

Wednesday, January 26, 2022

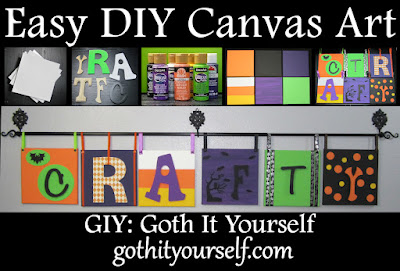
Crafty Canvases - Easy DIY Art


Here's an easy way to make art with canvases... no artistic skill required! You can have the art say whatever you want, and you can size it to suit your needs. You will need:

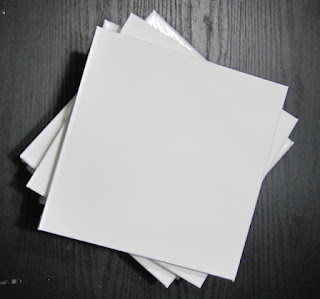
Canvases. Inexpensive canvases in various sizes are available at Michael's, other arts and crafts stores, and even Dollar Tree. I used six 10" x 10" canvases to cover a large wall area of six feet.

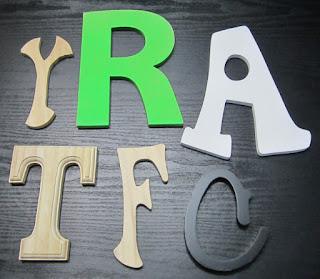
Letters. Now that decorating with letters is no longer a trend, people are donating letters to thrift stores, and craft stores are putting letters on clearance sales. Smaller posterboard letters are also available, or you can cut letters from scrapbook paper. I purchased wood and chipboard letters at thrift stores and at JoAnn for about $1 each.

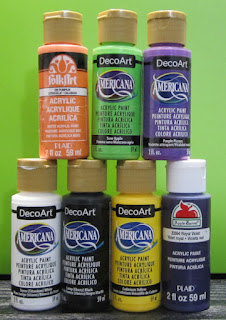
Acrylic craft paints. I used Halloween colors because I planned to hang the canvases in my Halloween theme workroom.

Decorative items to add to the canvases and/or letters. I used wood shapes, adhesive gems, scrapbook paper, and stickers.

Ribbon for hanging the canvases.
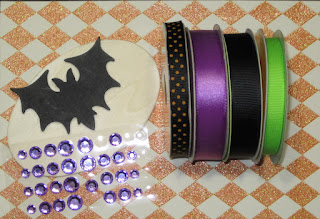

You'll also need thumbtacks and basic craft supplies such as scissors, paint brushes, and glue.

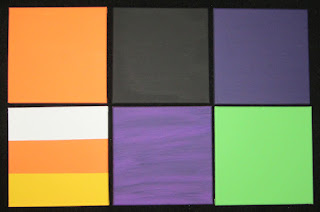
To begin, paint your canvases. Don't forget to paint the sides! I painted four canvases in solid colors, one in two shades of purple, and one in candy corn colors (using painter's tape to make straight lines).

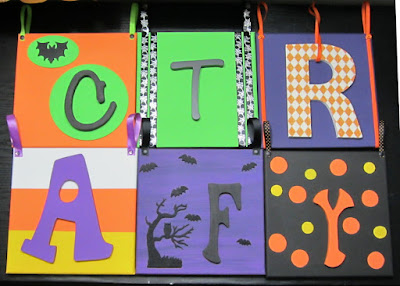
Paint, decoupage, or otherwise decorate your letters. I painted most of my letters a solid color. I decoupaged scrapbook paper onto the "R."

When all the paint is dry, glue the letters to the canvases and add other decoration. (If you have a heavy letter, such as my chipboard "R," you may want to hang it in front of the canvas instead of trying to glue it directly to the canvas.) My decorations included painted wood shapes, ribbon, 3D stickers of bats and a spooky tree, and polka dots painted with round sponge spouncers.

Add ribbon for hanging the canvases. If you will be hanging them on a bar like I did, use a loop of ribbon from the back to the front on the canvas. To hang directly on the wall, attach the ribbon from side to side. Secure ribbon with thumbtacks pressed into the wood frame of the canvas. 

Hang your completed canvases. I used a curtain rod hung on decorative hooks.
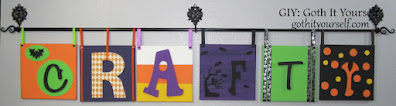

Feel crafty! :D


Thursday, October 1, 2020

IKEA Moppe Makeover

IKEA Moppe made over with Halloween papers. The drawers are separate, removable boxes with a finger cutout which can be turned to the front or back. Using the plain side as the front, I decoupaged the drawers and added label holder handles. I painted the exterior with black craft paint. Done!


DIY Paint Brush and Pen Holders

Super easy DIY! I upcycled drink mix containers into paint brush holders by simply wrapping them with paper. 

The containers are just the right height for paint brushes. For shorter pens and swabs, I cut a piece of sponge to put in the bottom of the container.


Wednesday, April 15, 2020

DIY Shelf from a Repurposed Drawer


After treating myself to new kitchen cabinets, I am repurposing the old cabinets. They're poor quality and quite worn, but most of them are serviceable for my workroom and garage. More on that later. :)

One base cabinet was in such bad shape that it essentially fell apart when I moved it. (I can't believe it managed to support the weight of a countertop for 45 years!) The drawer was the only salvageable part.

I decided to turn it into a shelf to store my craft paints. After measuring the paints and the drawer, I determined how far apart to space the individual shelves.

I made shelf supports with small slices of 1x3 boards and attached them with my power nailer. I placed 1x3 boards on the supports to create the shelves.

After primer and green paint, I added black and white striped wrapping paper and topped the shelves with black and white striped washi tape.

The end result is storage perfectly sized for my craft paints and other small supplies.


Thursday, April 2, 2020

DIY Dog Gate


As I mentioned in my entryway organizer post, the door from the garage into the house opens into a tiny entryway which is at the top of the basement stairs. 

My dog always greets me in this entryway. To ensure she doesn't fall down the stairs, I placed a baby gate.

The gate served its safety purpose, but it was ugly. It was also annoying because I had to remove the gate and set it aside every time I needed to go down the stairs. I wanted a gate I could simply swing open, but I faced a challenge. The gate could not swing into the entryway because it would block the entry on one side or the other. Therefore, the gate had to swing into the stairwell. But it could not swing to the left side because that's where the handrail is located, and it could not swing to the right side because there is a horizontal "shelf" sort of structure in the way. With some thought and the help of Google, I came up with a solution that would allow the gate to swing to the right.

First, I built the gate. I cut a piece of MDF to the appropriate size and then attached 1x3 and 1x4 boards to match the board and batten style of the entryway organizer.

Then I implemented the solution which allows the gate to swing to the right. This solution is... a board! ;) It's a 1x6 board which functions as a sort of gate post. The board is attached to the wall (to the door trim, actually), and the gate hinges are attached to the board.

The gate swings open to the right.

As with the entryway organizer, this was a "Why didn't I do this ages ago?" project. Instead of having to remove and replace an awkward tension gate, I simply have to swing a gate open or closed. And it looks infinitely better!
ugly, awkward plastic gate
not-ugly, easy-to-use wood gate

To finish the entryway makeover, I replaced the old door trim with new, wider trim in a simple style.


Monday, February 10, 2020

Entryway Organizer


Some projects have such an impact that I think, "Why didn't I do this ages ago?" Improving my garage entryway was one of those projects.

Because I park my car in the garage, I always use the garage door into and out of the house. The door opens into tiny entryway which has the basement stairs on one side and a wall on the other.

The entryway poses some real challenges. At only about 3 feet (1 meter) square, it provides just enough space for the door to swing open. Unless this door is propped or held open, it closes on its own. And trying to maneuver around the half-open door puts one at risk for falling down the basement stairs. (Safety was apparently of no concern to the designers of my house.)


Safety and convenience were both greatly improved by the addition of a magnetic doorstop. Simply push the door open until it touches the doorstop, and the magnet holds the door open. I love it! :)

To really level up the entryway, I wanted to add an organizer to hold my work laptop, bag, keys, and so forth. There was plenty of horizontal and vertical space on the wall; however, depth was an issue. The organizer had to be shallow enough to allow the door to open completely.

The biggest challenge was finding something large enough to hold my work laptop but thin enough to fit behind the door. Finally, I found a wire basket at the thrift store.

I decided on a board and batten style for the organizer. Using boards, tape, and cardboard, I marked the placement of each element.


I wanted the organizer to serve a secondary purpose of covering prior doorknob damage and a badly patched area where a large dog door had once been. To accomplish this, I attached hardboard to the wall.


Then I attached 1x3 (vertical) and 1x4 (horizontal) trim boards. Hooks would be attached to the horizontal boards, so I ensured that they were screwed firmly into the wall studs. I painted everything grey to match the walls.


I attached the basket and four hooks.


Done! :)

Now, instead of hanging my bag on the back of a chair and putting my laptop on the dining room table, I can keep everything in one place by the door. And it all fits neatly behind the door in a space less than 5 inches (13 cm) deep!


Monday, October 23, 2017

New Flooring

My new flooring is done. :D I replaced the old oak color with dark brown/black (TrafficMaster Allure Ironwood). In the dining room, living room, and entryway, I installed the new flooring in the opposite direction as the old (east-west instead of north-south).

I think this direction looks better. The difference is especially apparent in the entryway.

In the hallway, installation was challenging. I had to work around six doors, and the new flooring had to transition to existing flooring in five rooms.

Four of those transitions were in the center of doorways across from each other. There was no margin for error because even a tiny space between the planks would be obvious. It was a real victory to get them all matched up exactly right. :D

The transition point between bedrooms and hallway is clear. On the left, my bedroom still has the old oak color flooring. On the right, the other bedroom has walnut. In the middle is the hallway with the new brown/black flooring.

The transition between bathroom, hallway, and workroom is visually seamless because all three have the same color flooring.


Friday, August 4, 2017

Disguising the Electronics

Electronics are useful but typically not very decorative. My speakers, modem, and router are black and thus not overly conspicuous on my black furniture. Nonetheless, I decided to make disguises for them. Even electronics like to play dress-up, right? ;)

To dress the subwoofer (Can I just say... I love that word! My dorky brain can't help but think of a subwoofer as a less dominant dog. In my house, Indigo is the woofer and Nook is the subwoofer. WOW, I am corny!)

Anyway, to make a disguise for the subwoofer, I used a black cardboard box...

And a photo frame from the dollar store.

I removed the back and the glass from the photo frame. Using acrylic craft paint, I painted the frame black and set it aside to dry. I centered the back on top of the box lid and traced around it with a pencil.

Following the pencil lines, I cut out the rectangle from the box lid.

I turned the lid over bottom side up. To cover the hole, I used a piece of black lace. I duct taped it into place. Duct tape isn't very classy, but it's MUCH easier than trying to glue lace.

I turned the lid back over so the top side was up.

I added the frame. It has little metal tabs which one would normally bend inward to hold the back in the frame. I bent them outward instead, and they worked perfectly to hold the frame in the opening.

Then I turned my attention to the box itself. The box was shallower than the subwoofer. This wasn't really a problem, though, as I didn't need to enclose the entire subwoofer. I simply cut a hole in the bottom of the box large enough for it fit through.

I slid the box over the subwoofer with the box's bottom toward the back and the top toward the front.

And placed the lid on the box.

The router generates some heat, so I did not want to enclose it in a cardboard box. Instead, I placed it in a magazine holder made of filigree metal.

I turned the holder backward so the tall "front" hides the router while the much shorter "back" allows the cords to exit. I used a second magazine holder for the modem.

For the speakers, I made covers that double as candle holders (details HERE). The disguises were complete!

After looking at the pictures... I think I'll shift things so the box is in the center with a magazine holder on either side. I like symmetry.

EDIT:
I made the change. Symmetry!