Saturday, September 29, 2012

Baseboards. I Have Them.

Before moving into my house, I pulled out all the old, gross carpet. The baseboards were gunked up with several layers of paint and embedded carpet fibers, so out they went as well.  And for almost three years, my poor house has been lacking baseboards.

Modern baseboards don't have much of a function beyond aesthetics, so they haven't been on the top of my priority list. But with the recent purchase of a miter saw and pin nailer, I finally had the right tools to tackle the installation of baseboards. My bedroom was the first recipient.

no baseboards
with baseboards
The baseboards don't make any kind of grand style statement, but they help the room look more finished.

Like most rooms in my house, my bedroom has no overhead light. The switch on the wall activates a "magical" electrical outlet into which one plugs a lamp. And like most of the magical outlets in my house, the bedroom one is the in stupidest possible place. To get light in any useful area of the room, I have to run an extension cord across the room. In my bedroom, a 30-foot extension cord goes from the outlet on the west wall all the way across the south wall (behind the head of my bed) and the east wall to a lamp in the northeast corner.

To keep the cord out of the way, I used masking tape.  NOT an elegant solution. 
no baseboards; tape holding the cord
After installing the baseboards, I added a cord management system along the south and east walls.  It's basically a plastic channel that sticks to the wall and snaps shut to enclose the cord. Very easy to install and it keeps the cord neatly out of the way. The channel can be left white or painted to match the wall color.
with baseboards and cord management
Most of the baseboards in my bedroom are hidden behind furniture or curtains, so it was a good room for this first-timer to practice on. I am proud to say that only one splice is a little wonky.  :) 

Thursday, September 20, 2012

Bat Pediment and Fluted Molding

My house has very little trim/molding. The windows are bare, and the baseboards and door casings are small and plain.

As the first step in my quest for a house-wide trim upgrade, I bought fluted molding and corner blocks for the doors in my bedroom. I had the idea to paint black stripes into the fluting to coordinate with the room’s black and white striped accents. Alas, my hands are too shaky to paint with that kind of precision. The stripes were sloppy no matter what I tried, and I had to abandon the idea. :(

But even in plain white, the fluted trim would be an improvement. I went ahead and installed the trim around the closet door... poorly. My measurements were off, and I did not like the way the corner blocks looked. :(

The quest was not going well.

I'd used glue to install the trim, and removing it caused significant damage to the wall.

The quest was not going well at all.

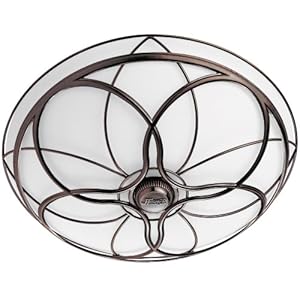
To cover the damage, I needed some kind of trim that was larger than the fluted molding and corner blocks. Surfing the web for ideas, I came across this:
source

The shape immediately made me think of an MDF bat I'd bought.


Inspiration! I would make a bat pediment!  :)  Using careful (extra careful!) measurements of the doors, I drew and cut a template out of cardboard.


When I was happy with the size and shape of the template, I traced it onto MDF (medium density fiberboard) and cut it out with a jigsaw.  Because the MDF was about half as thick as the fluted molding, I cut two pieces and glued them together to get the necessary thickness.


I painted all the pieces white and glued the bat in place.

And installed the pediment over the door. 

I'm liking it, but it doesn't look quite finished. Perhaps a bit of thin trim along the bottom of the pediment?

Tuesday, September 18, 2012

Pumpkin Time

Autumn is my favorite season. This year, I await it more eagerly than usual because it has been a long, hot summer. I swear I have been continuously hot for three and a half months. :( Enough summer already!

Finally I am noticing a few hints that autumn is on the way. The mornings are cooler. The apples on my tree are nearly ripe. And there are pumpkins!

On a seemingly unrelated topic, I've had this three-tier (what I think is a) plant stand for a while. I painted it black, but it sat empty because I couldn't think what to put in it.

Then it occurred to me... pumpkins!

Little orange and white and stripey pumpkins! They're so cuuute!

Think quick - are pumpkins a fruit or a vegetable? ;)

Wednesday, September 12, 2012

Polystyrene Tiles over Popcorn Ceiling

My house has popcorn ceilings, which I do not like. One of the few options for covering popcorn ceilings is polystyrene (Styrofoam) tiles. They're not expensive and are supposed to be easy to install, so I decided to try them in my bedroom.

I ordered style R-32 tiles online from DecorativeCeilingTiles.
style R-32
Though this style looks great with painted accents...

I ultimately decided to leave my tiles plain white. The room is small and I feared painted tiles would be too busy.

Before beginning installation, I measured my ceiling and determined how the tiles would need to be arranged. The tiles are 19.5" square; my ceiling measures 120" x 139". Thus my layout would be 6 tiles (plus 3" needed) by 7 tiles (plus 2.5" needed). I split the difference, leaving 1.5" on either side of the 6-tile run and 1.25" on either side of the 7-tile run. These small areas would be covered by crown molding. I wouldn't have to cut any tiles! How lucky is that?!

Next, I measured out 1.5" and 1.25" so I'd know where to start my rows of tiles, and marked the ceiling with chalk lines.


Then, I began gluing up the tiles. I put small dollops of adhesive in a few places around the tile...
positioned the tile on the ceiling, and pressed firmly.

I used Loctite Power Grab construction adhesive, and it worked GREAT. It grabbed quickly and I only had to press each tile in place for a few seconds.

Installation Tips:
  • Press firmly on the tiles with the palm of your hand.  Don't press too hard or press with just your finger because you might crush the raised pattern on the tile.
  • Don't spread or flatten the adhesive on the tile if you're gluing to a popcorn ceiling. Dollops or globs of adhesive grab the texture better.
  • Use white or clear adhesive if you're using unpainted tiles. The tiles are very thin, and colored adhesive will show through!

The installation was extremely easy and surprisingly fast. I had three rows of tiles up at 1:27 p.m.


    At 1:50 p.m., I had four rows up.

    Including prep and cleanup, the whole process took me less than four hours. I am very happy with the result! And it should look even better once the crown molding is installed. :)

    Total cost of the project was less than $200:
    • 42 tiles at 3.99 each + shipping = about $180
    • 4 tubes adhesive at 3.50 each = $14

      Friday, September 7, 2012

      Pretty, Practical Lighting

      In the US, most newer homes (and many remodeled homes) have recessed lights. I suppose they're practical, but I've never thought they were particularly attractive. They are basically glowing holes in the ceiling.
      source

      In my opinion, it's hard to successfully integrate recessed lights into rooms that have a dressier or more traditional style of decor -- gothic, dark romantic, Victorian, old world, Tuscan, etc.  Someone else must agree, because the multi-bazillion-dollar home improvement industry now offers decorative trim for the ubiquitous "can" lights.
      from Improvements

      from Home Depot
      Another practical feature making decorative headway is the bathroom fan.  Leaving behind its boring plastic grate, the bath fan is now joining forces with the bath light to create the decorative fan/light combo.
      from Amazon
      from Amazon

      You can even buy chandelier fans!
      from Amazon

      from Amazon
      Proof that practical doesn't have to be plain!  Anyone else excited to see practical items made pretty?